Prefer Written Instructions?
We commonly receive questions about Analysis Services security. In this tutorial, we walk through the steps of how to define users and what they can access.
(Note: For a close-up photo of the screenshots in this tutorial, simply click on the image)
Connecting to Analysis Services
To define security on cubes, you’ll use the SQL Management Studio tool.
Go to the upper left-hand corner of the screen and click Connect. Then click Analysis Services.
When the dialog box appears, type in your server name and click Connect.

Once you’re connected, you’ll find the various data bases that are available to you to on the left side of the screen.
Creating a Role
Security is defined through roles. A roll is a unique combination of permissions. If you have certain users that can access certain cubes, you’ll define a roll for each of those unique combinations.
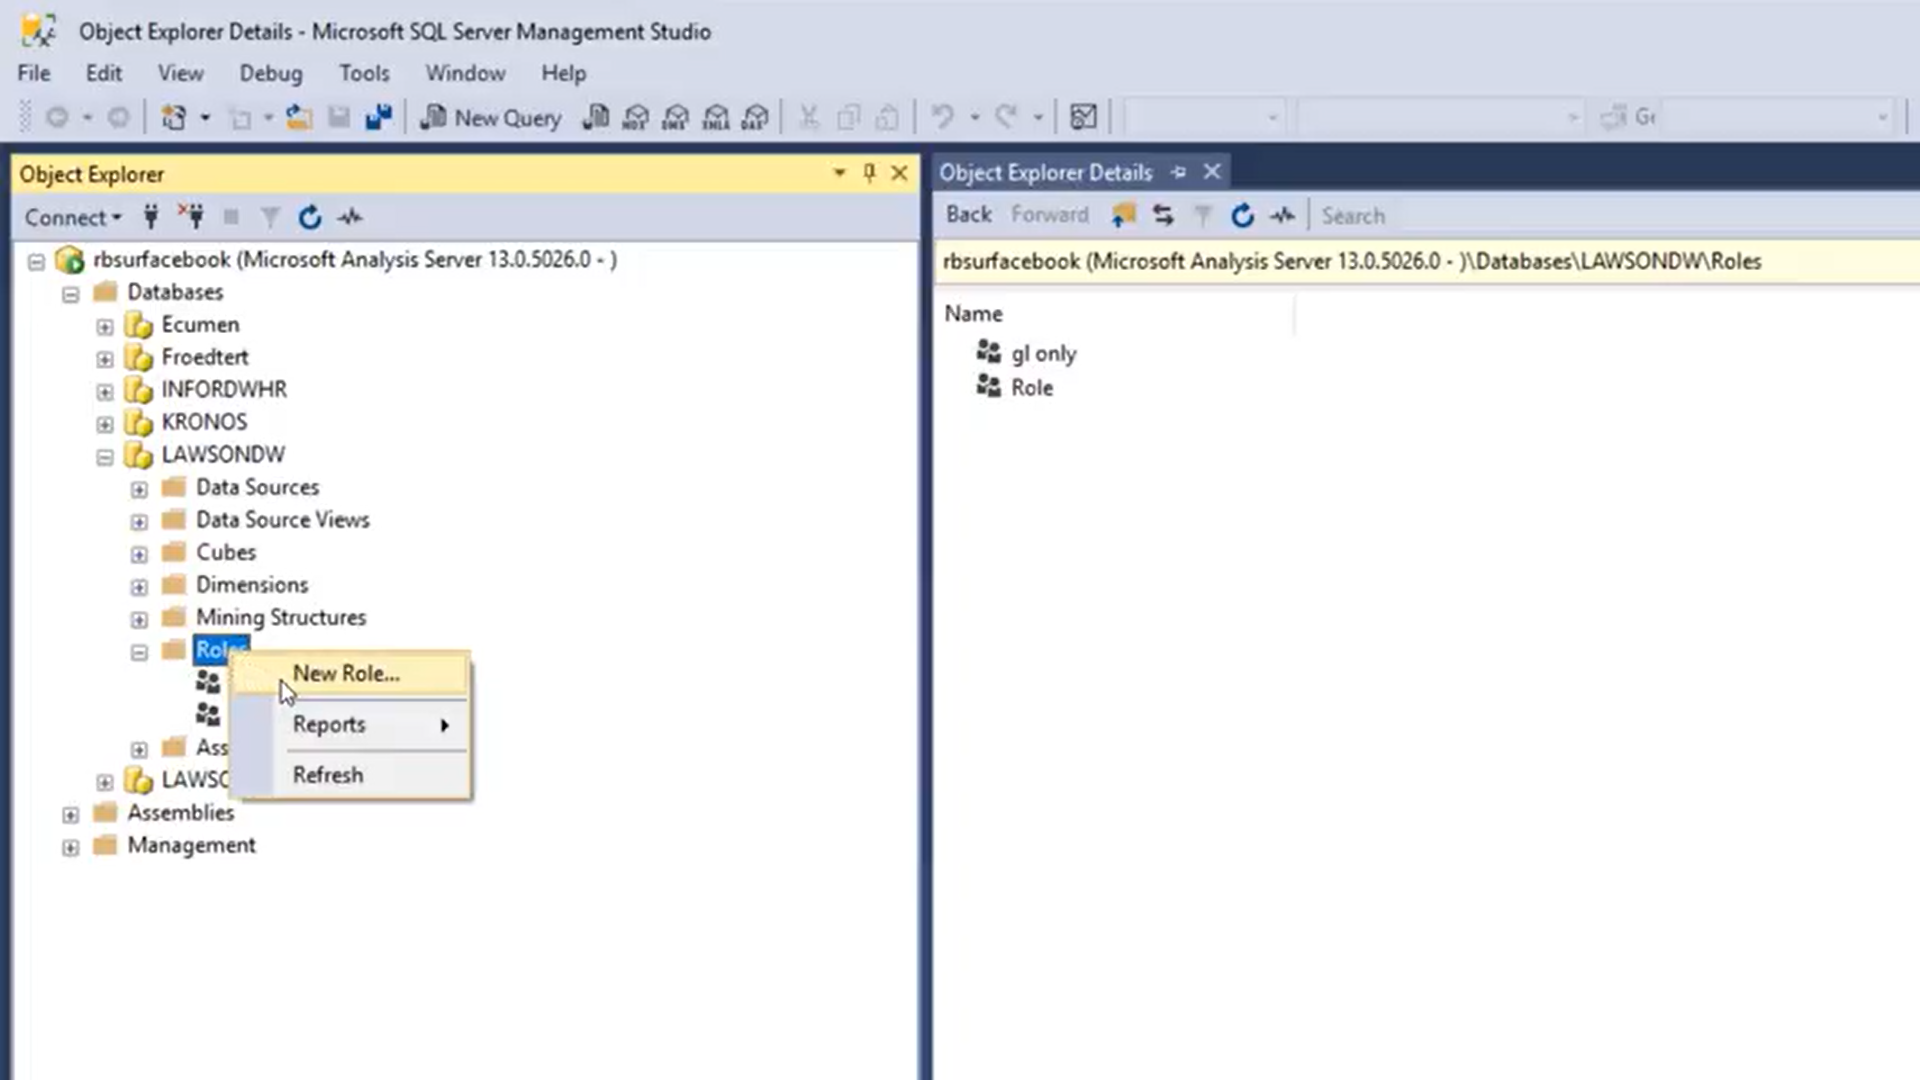
For example, I am going to go into a database called LAWSONDW. Underneath that, there is a series of roles. To define a security for this database, I right click on the Roles file and select New Roll. This brings up the Create Roll dialog box.
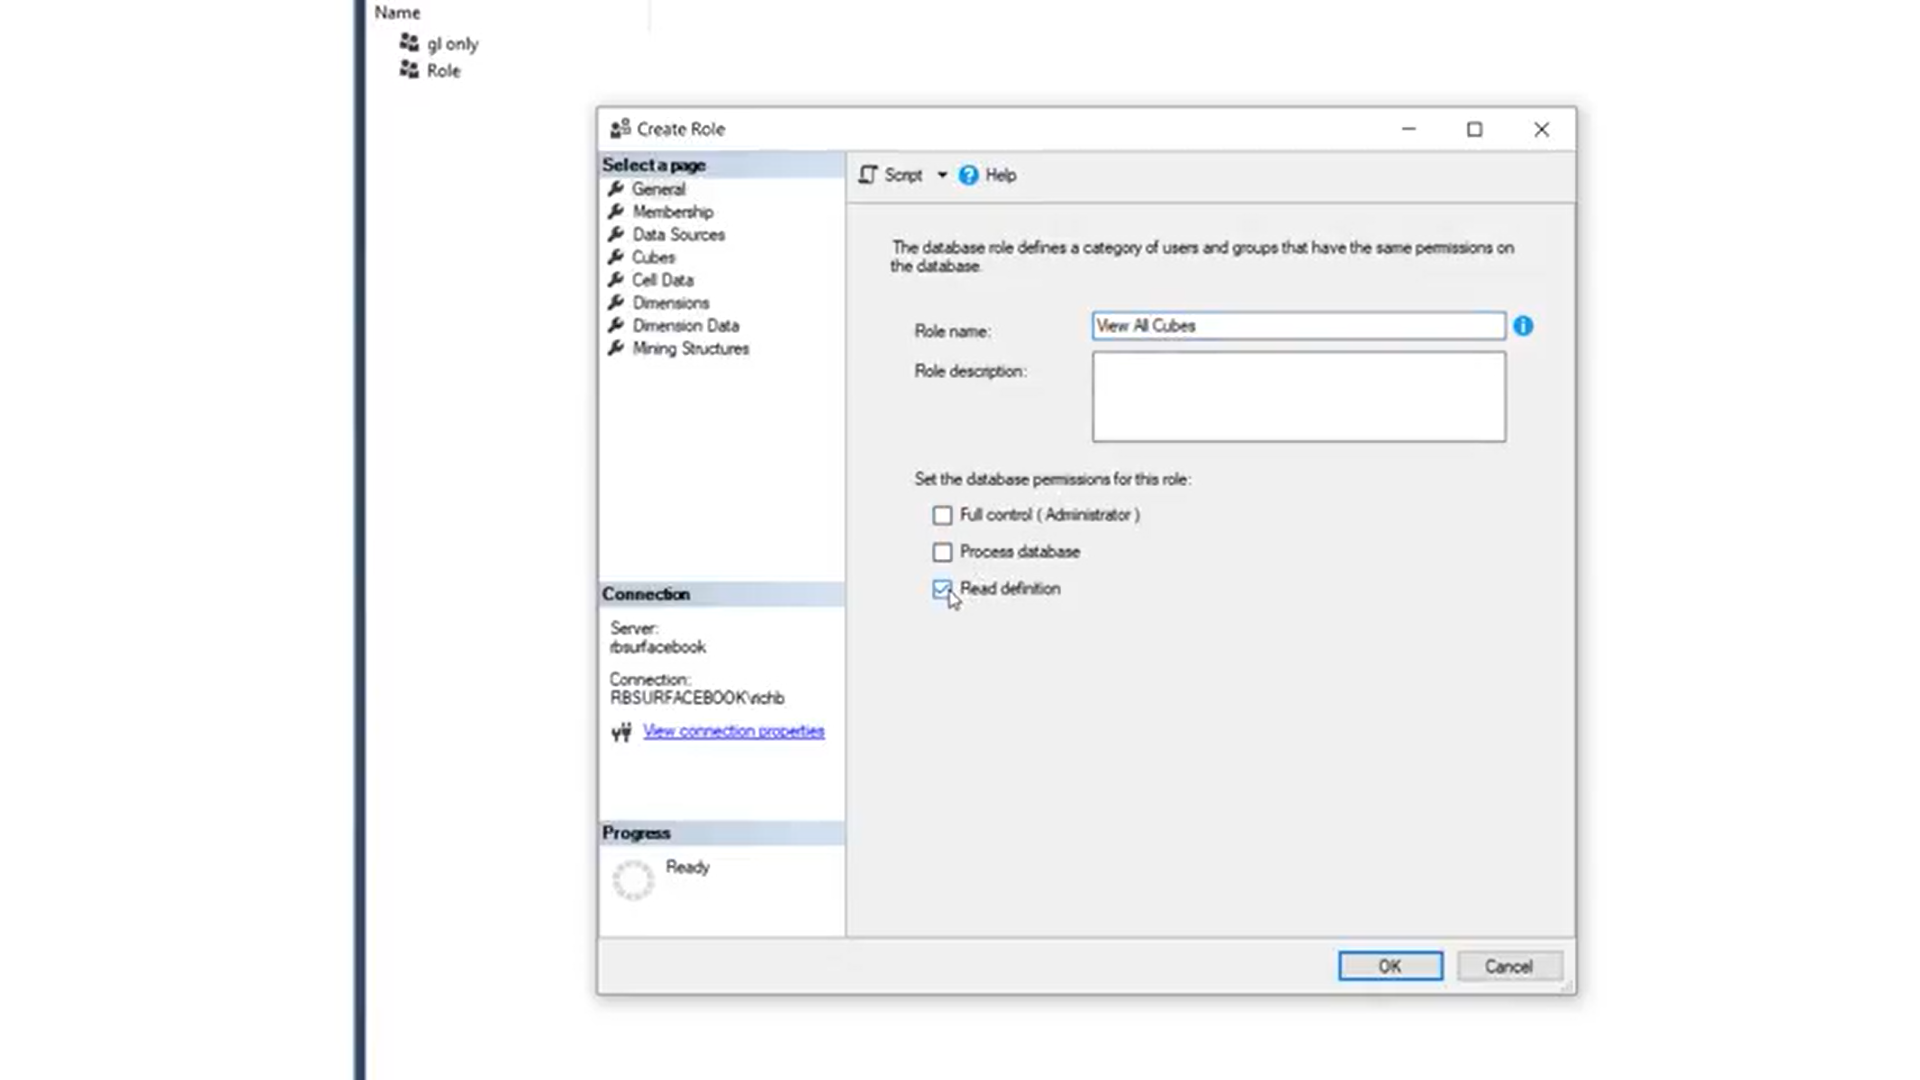
Next, I name this roll “View All Cubes.” Then I select Read Definition for this database’s permissions.
Defining Security for a Role
In the upper left-hand corner of the dialog box, you’ll find a menu of security options (General, Membership, Data Sources, Cubes, Cell Data, Dimensions, Dimension Data and Mining Structures). You probably won’t have to utilize all these options. Simply start walking down this list for as deep as you need to go according to your security needs. We’ll touch on a few common settings in these menu options below.
Membership
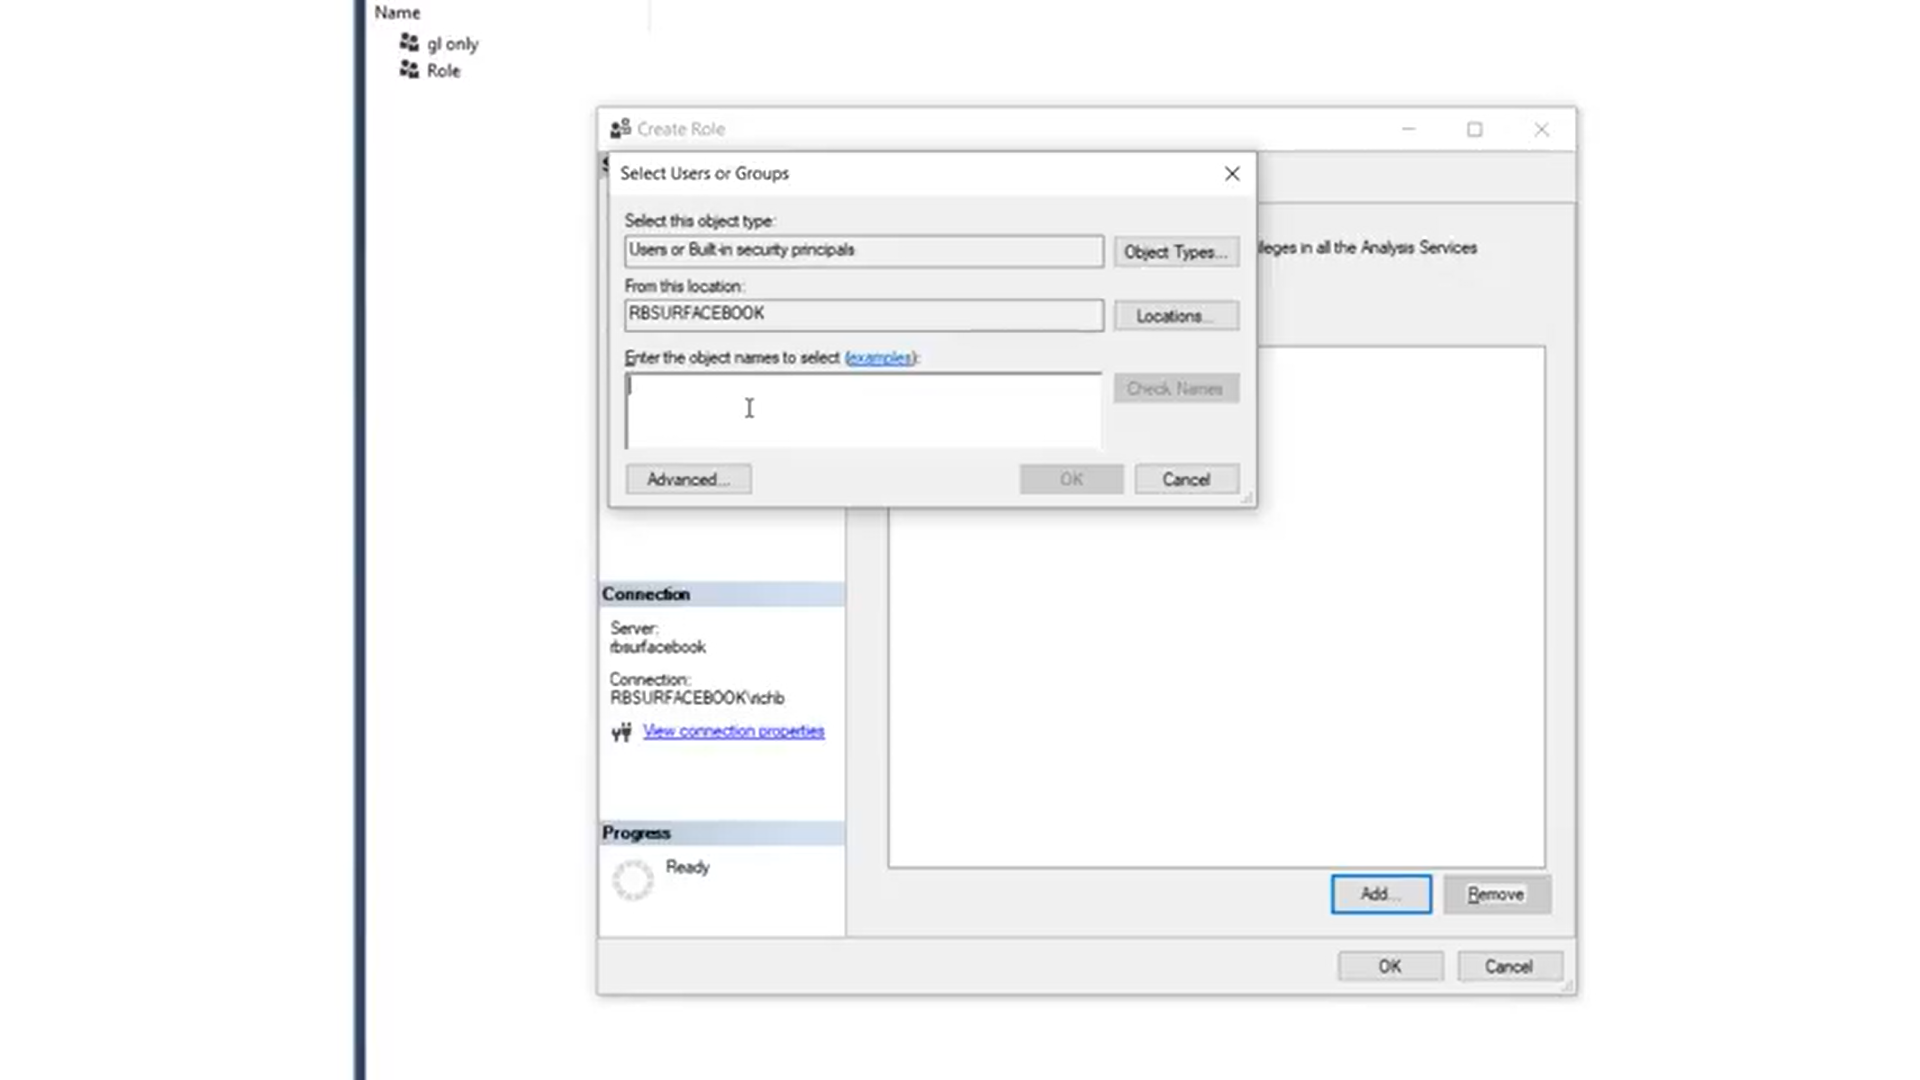
Click add. When the pop-up box appears, enter each of the users or AD groups that you want to grant access to this role.
Data Source
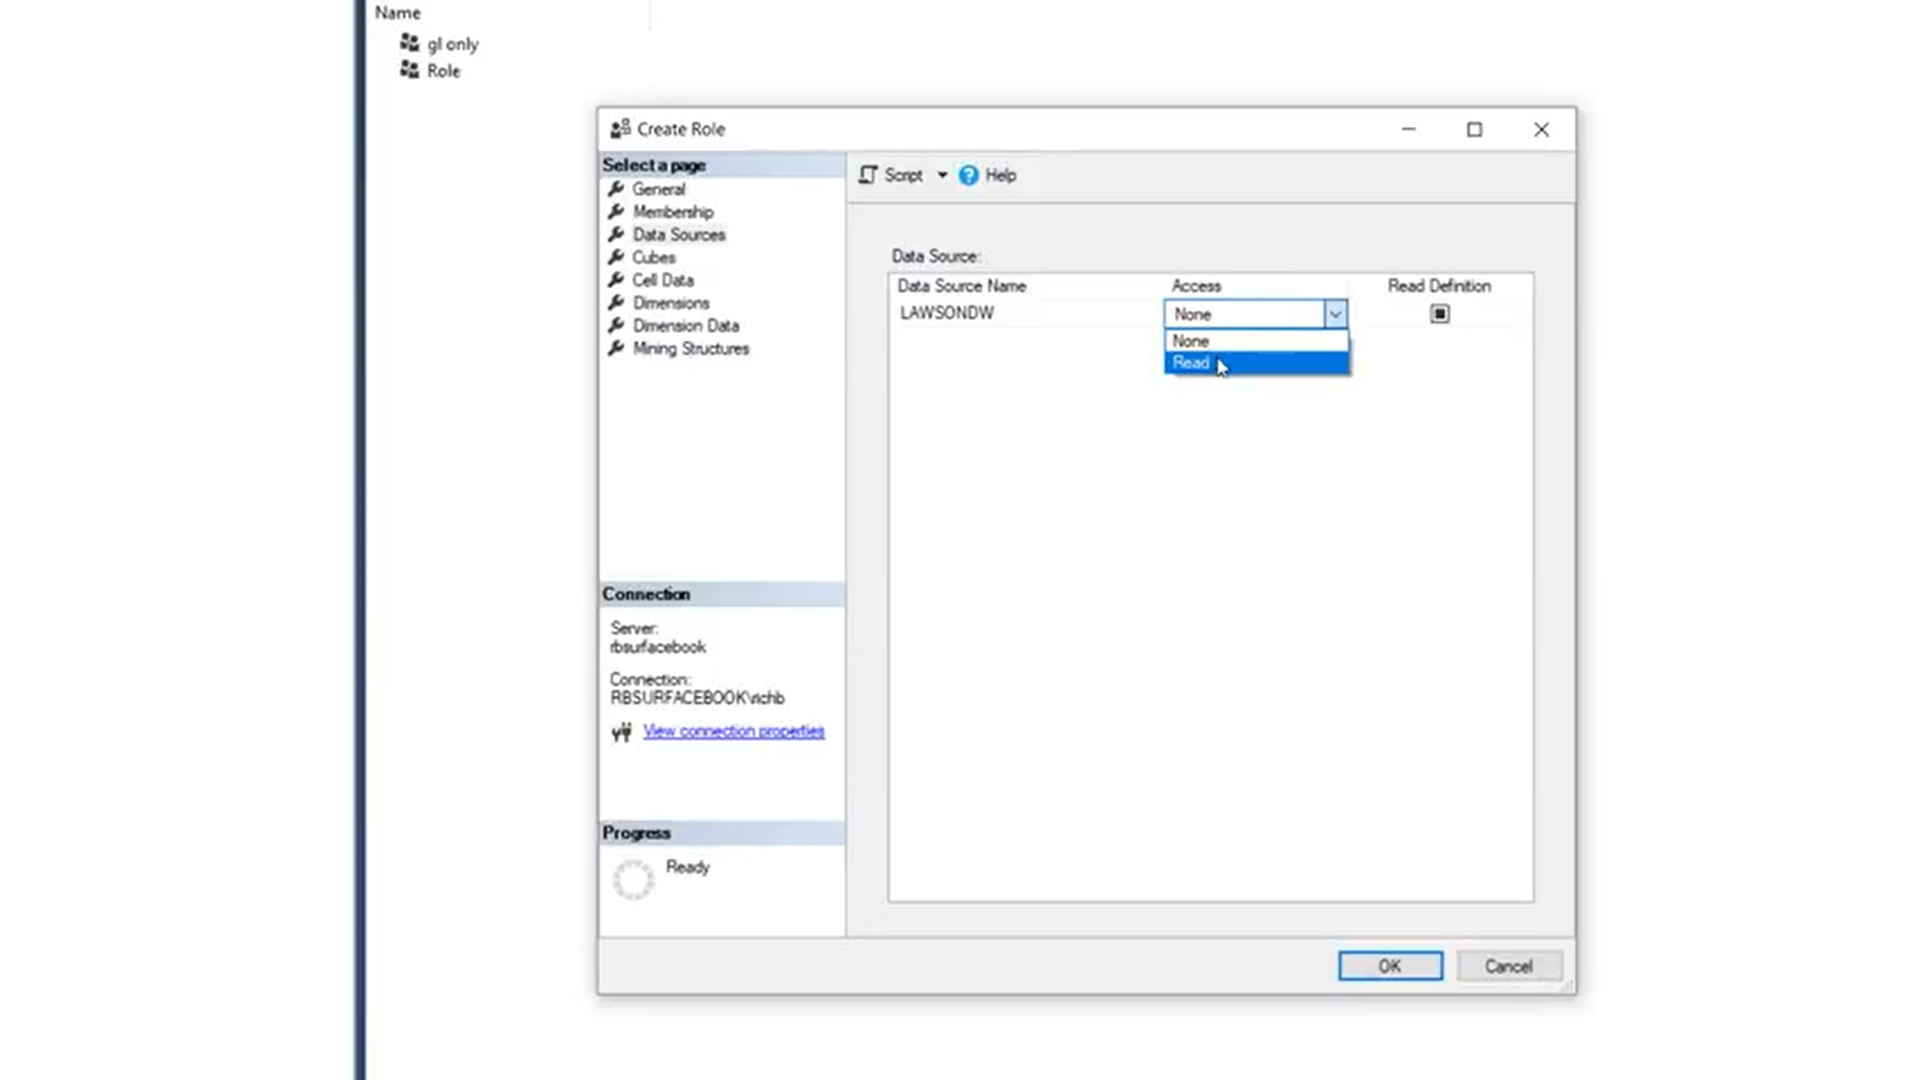
In the access column, select read.
Cubes
To grant your role access to a cube, simply select read in the access column next to the desired cube.

The next column under the Cube tab is Local Cube/Drillthrough. By selecting Drillthough, your role will be able to double click on a cell in excel to get additional details about that data. This is a great option for seasoned users who want to be able to dig into the data a little deeper.
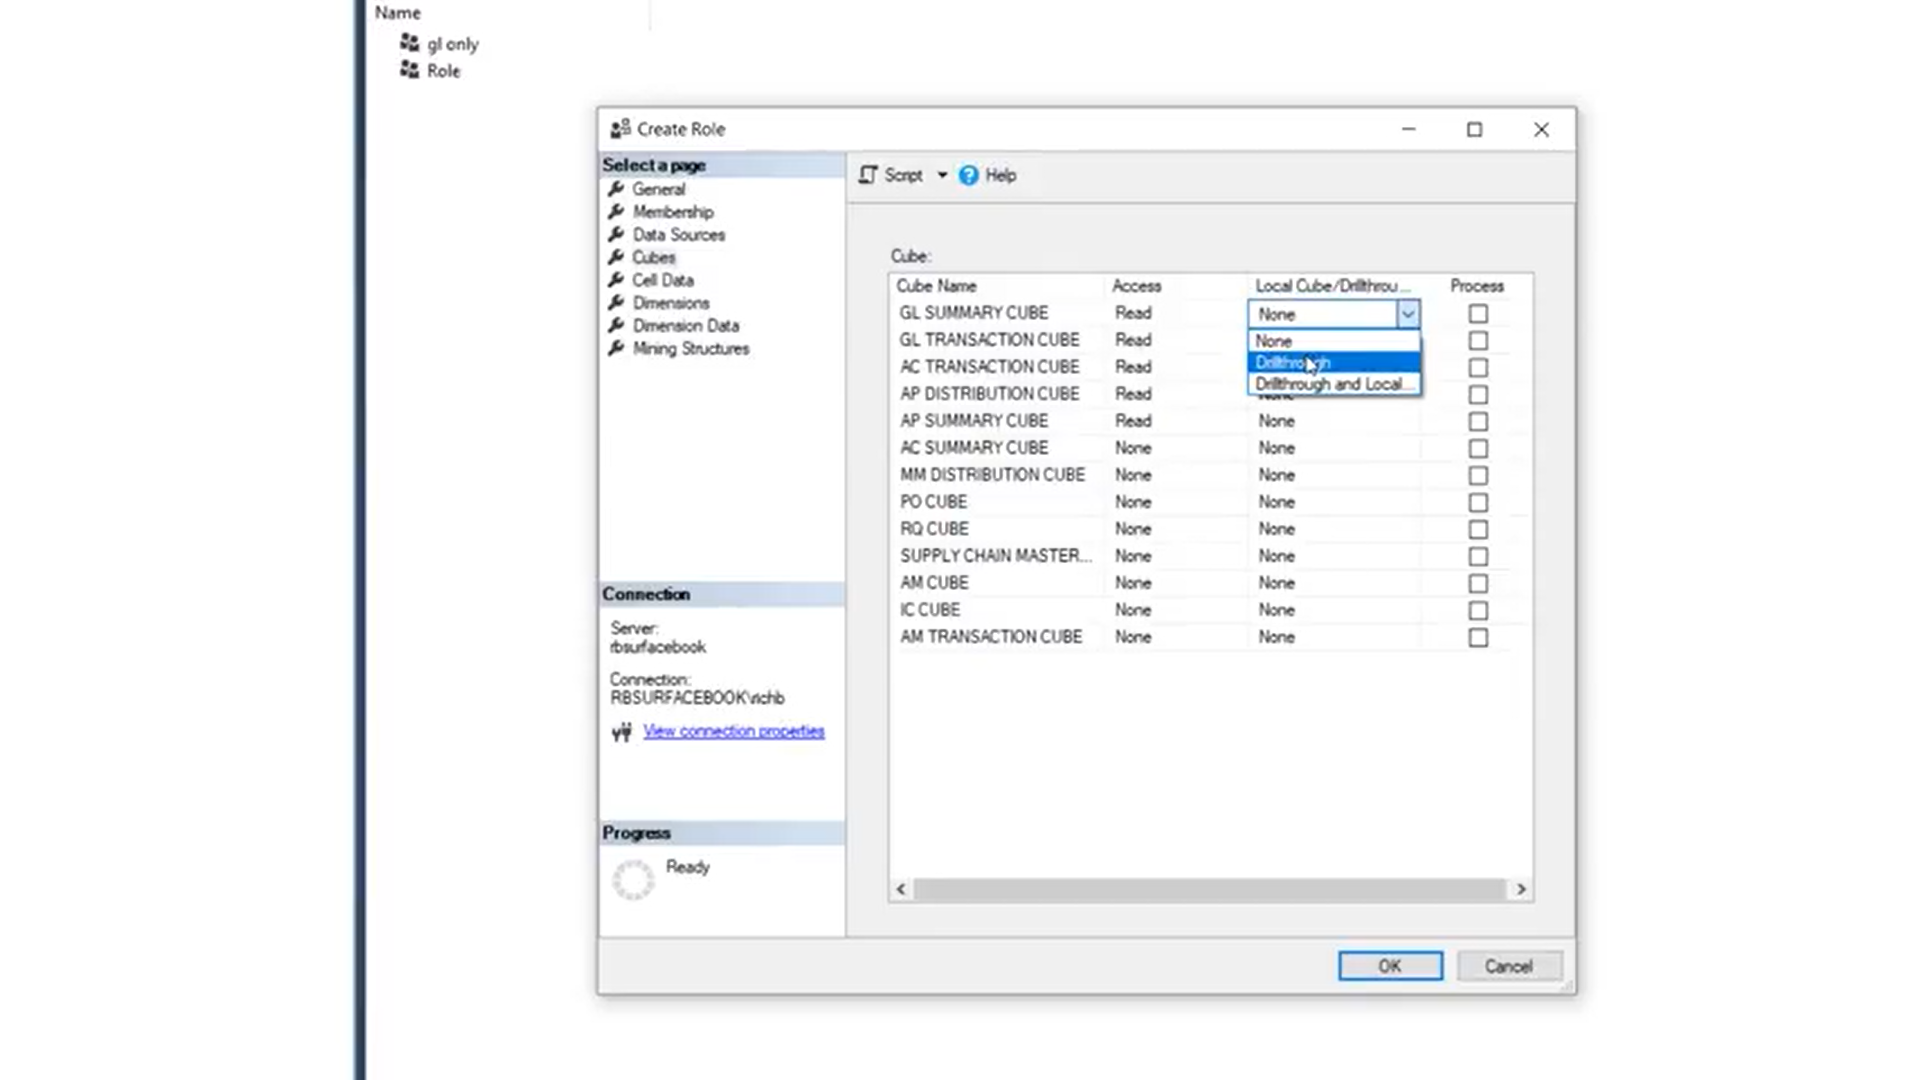
Please Note: if a user is not familiar with the underlying data, drillthrough can end up dumping a lot of extra data. Because of this, we only recommend granting drill through capabilities to those who are educated on properly using this feature.
Another option you have is to grant Drillthrough and Local Cube Access. This allows users to export the data to a local cube file. Usually organizations do not like to allow this function, so this option is not commonly used.
If you do not wish to grant drillthrough access, simply select none.
Utilizing Additional Security Settings
Often times we don’t need to complete the rest of the menu options. We could just stop at this point by clicking OK. However, a common scenario that we run into is that organizations only want to give users access to certain companies or account units. To limit this access, you need to further define the role’s dimension data. In other words, you’ve already granted access to cubes, but you’ll also need to grant access to specific data within specific dimensions.
Click the Dimension Data option in the menu. The dimension box at the top will have a drop-down list of all the available dimensions. For example, let’s say I wanted to grant access to a specific company for this particular role. To do so, I click on the COMPANIES dimension and click OK.
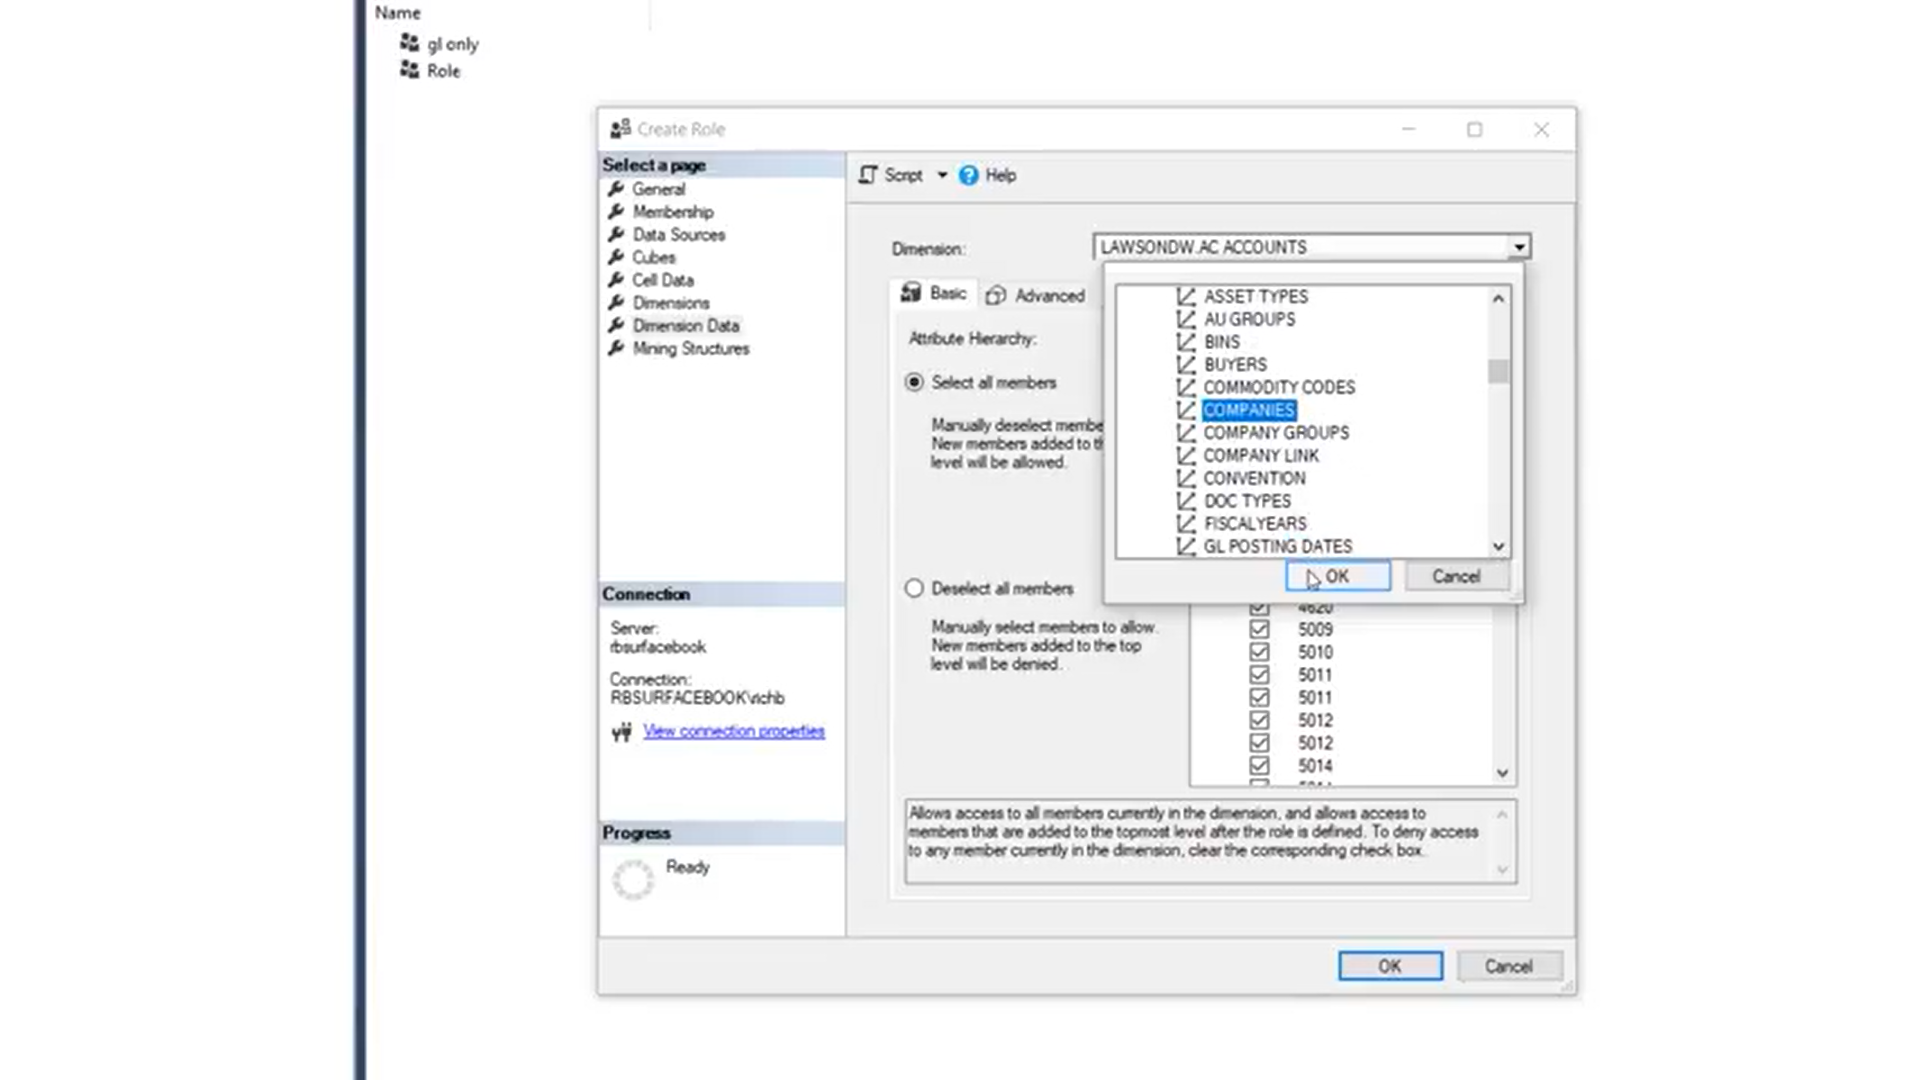
The Attribute Hierarchy box will list all the attributes that are a part of that dimension. For example, the companies dimension has three attributes listed: company full name, company name and company number. For this example, we’ll select COMPANY NUMBER as the attribute.
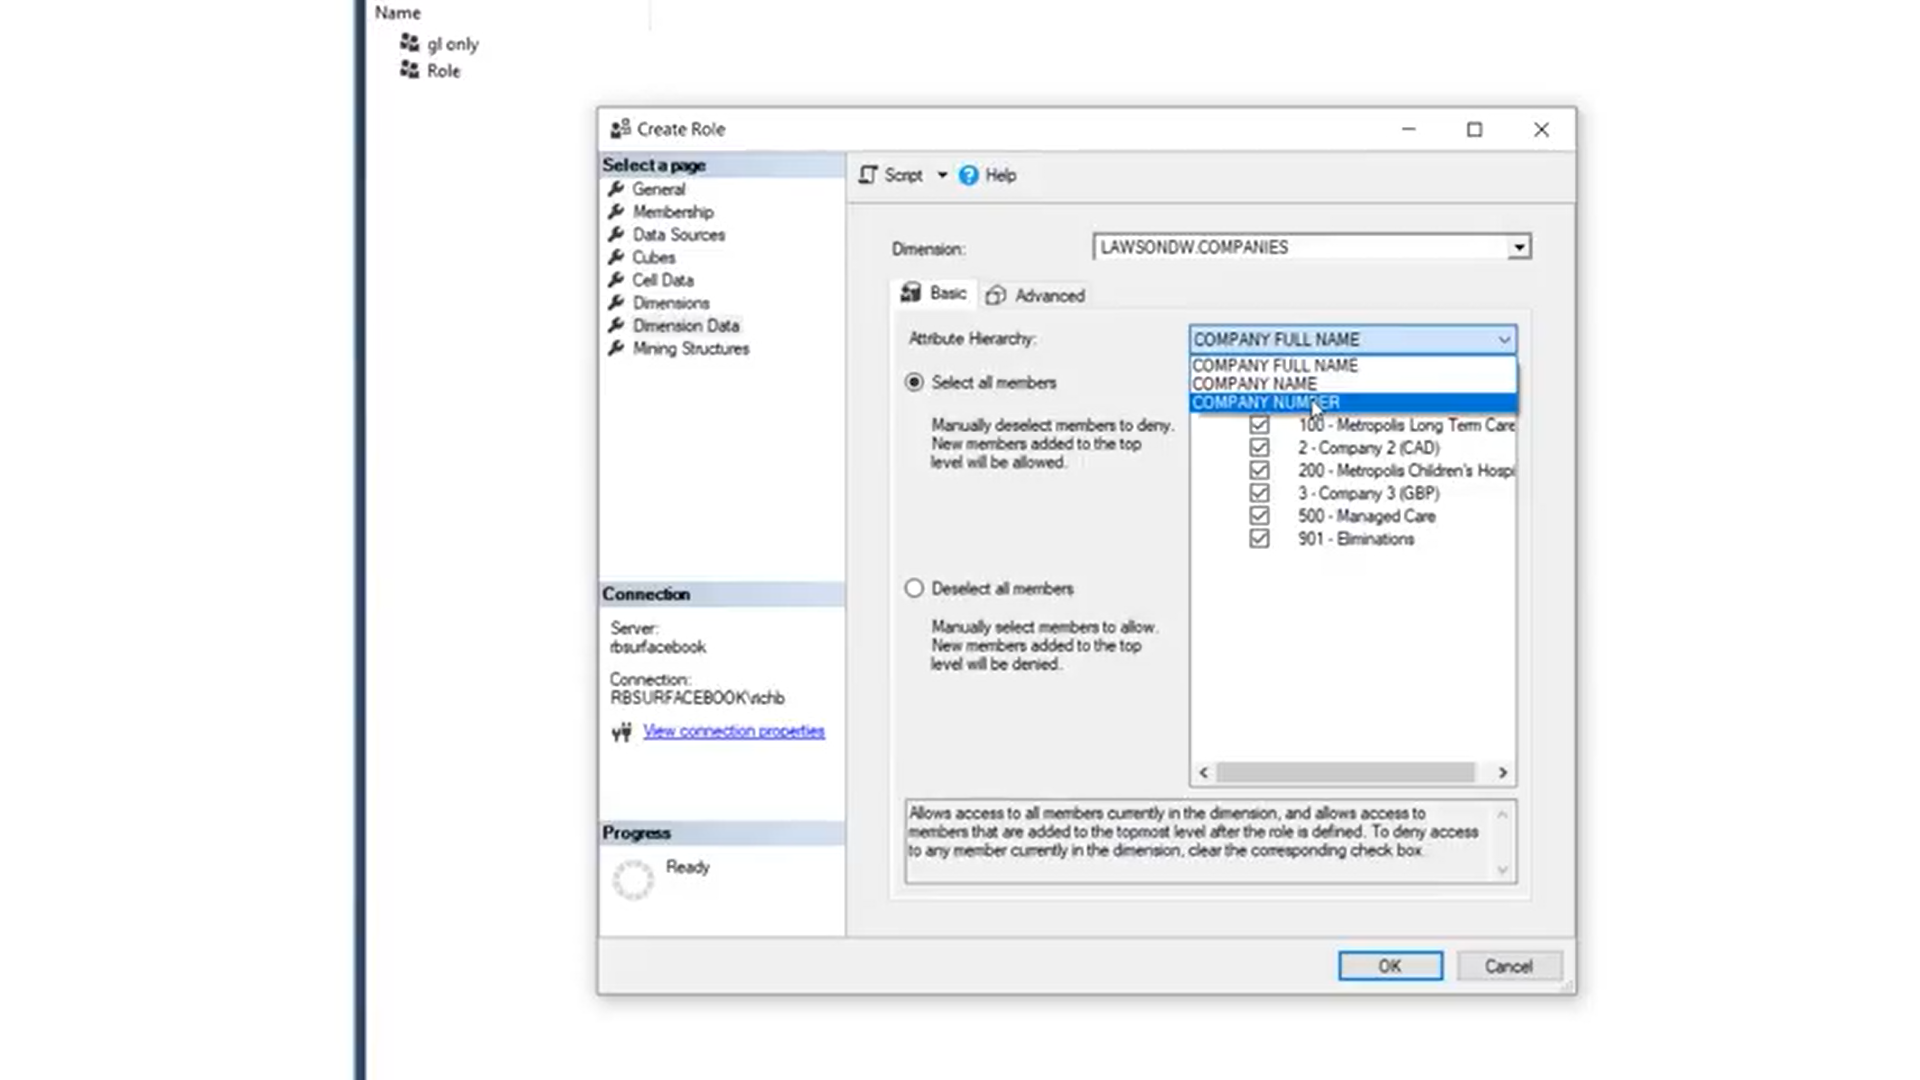
Now, the box below will show a list of all the company numbers. I only want this roll to have access to a few companies, so I click the Deselect All Members bubble. Then I go through and select the companies that I want the roll to have access to (in this example, this includes companies 1 and 3).

PLEASE NOTE: Make sure to select Deselect All Members and then select the companies you want your role to have access to. Don’t just uncheck the boxes that you want to exclude. If you keep the select all members box checked, it’s automatically giving people access to values vs. having to explicitly give access to those values.
To complete this process, we need to do one last step. Go to the Advanced tab and select the default member. If you want to ensure that the security is always enforced, you need to add a default member of all. This ensures that every time this dimension is part of a cube, it will apply the security by default. Without this specification, it will only apply the security when you apply the dimension.
To edit the default member, click the Edit MDX button.

Then, under the Metadata box, select COMPANY NUMBER and then Members. Double click ALL COMPANIES so that it displays in the expressions box above. Then select okay.

Take note of the Enable Visual Totals checkbox at the bottom of the advanced tab. When I am looking at data in Excel using this dimension, it is going to either:
a. Filter the total amounts for only the companies my role can see (if the box is checked)
b. Show me the totals that include all of the companies, even those I am not authorized to see. Because of the security, it wouldn’t let me go down and get the details. But the totals would include all the companies.
Most of the time, you only want to see the companies that you have access to, so I recommend checking the Enable Visual Totals box.

Then select OK. Your role is created!
Helpful Hints
How to Check if a Security Has Been Applied
If you want to check and see if the security has been applied, find your role in the Roles file on the left side of the screen. Right click on your role and select Properties.
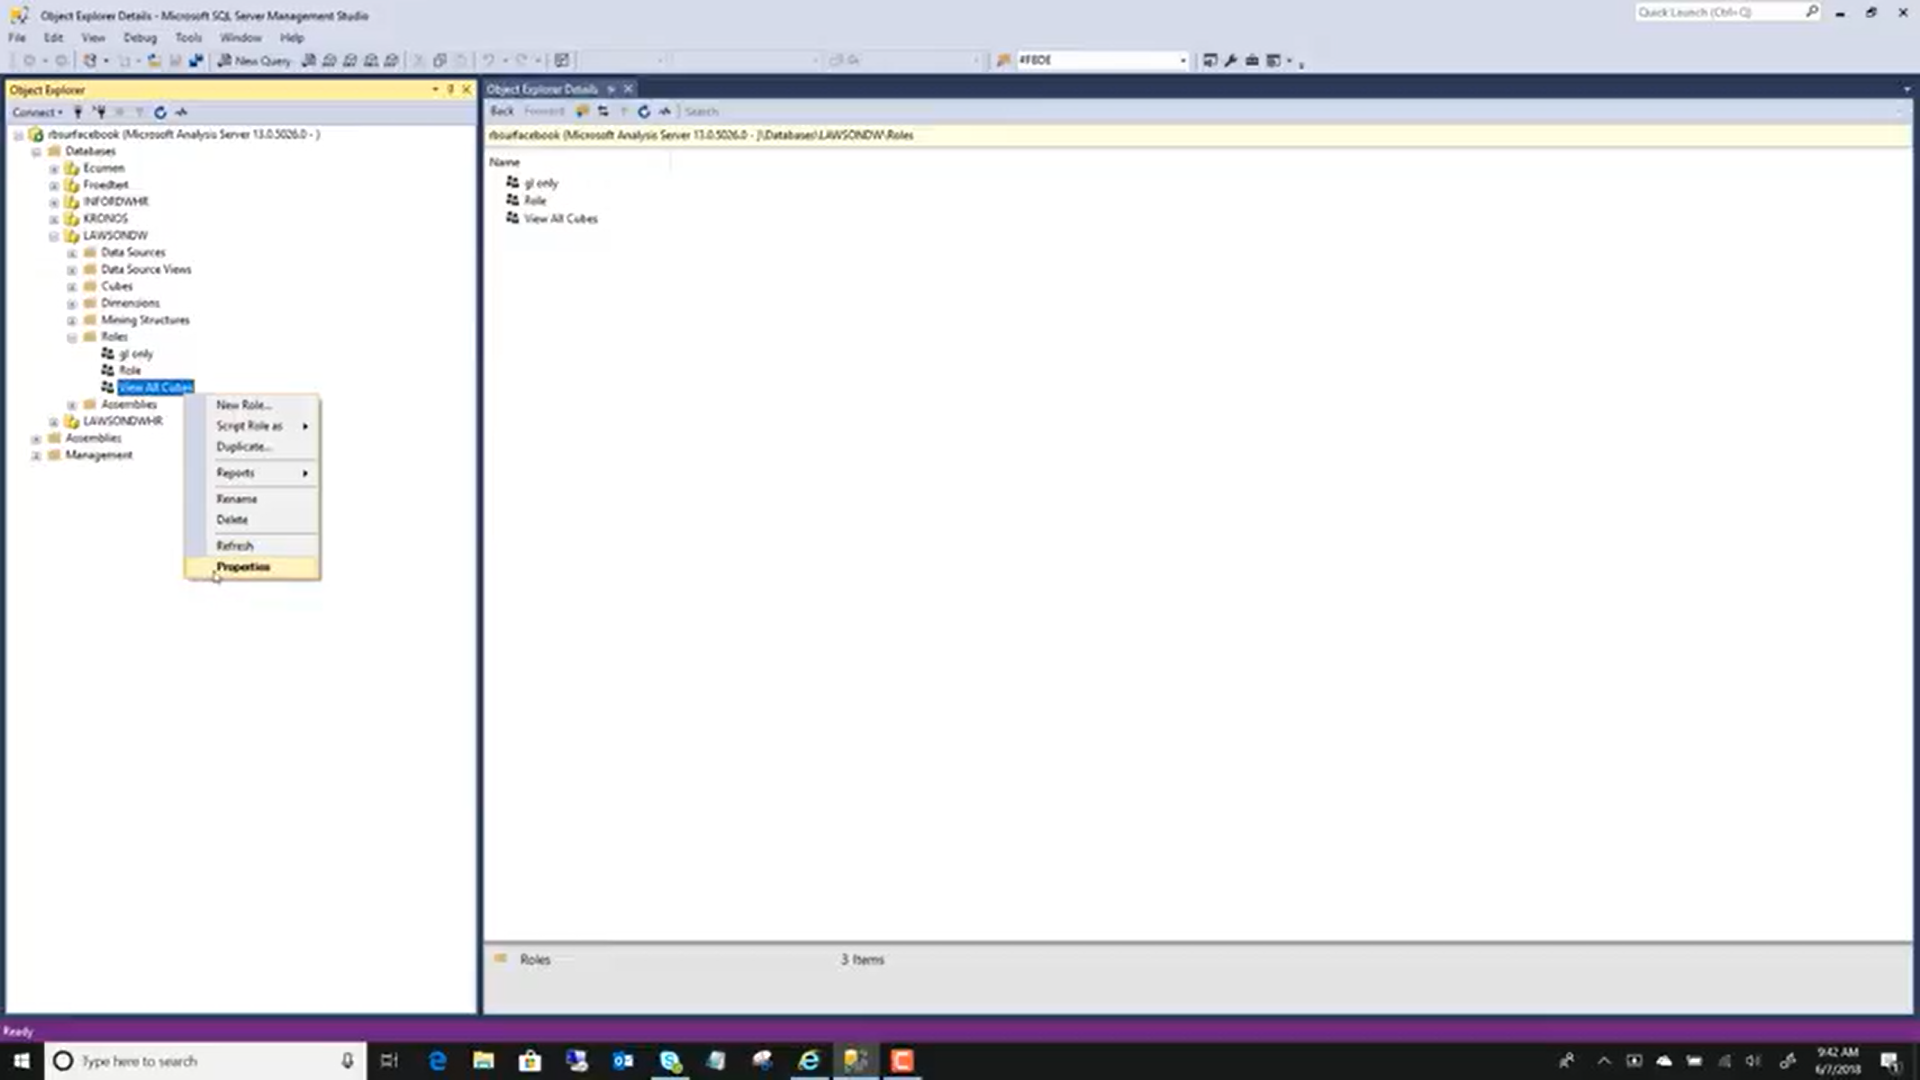
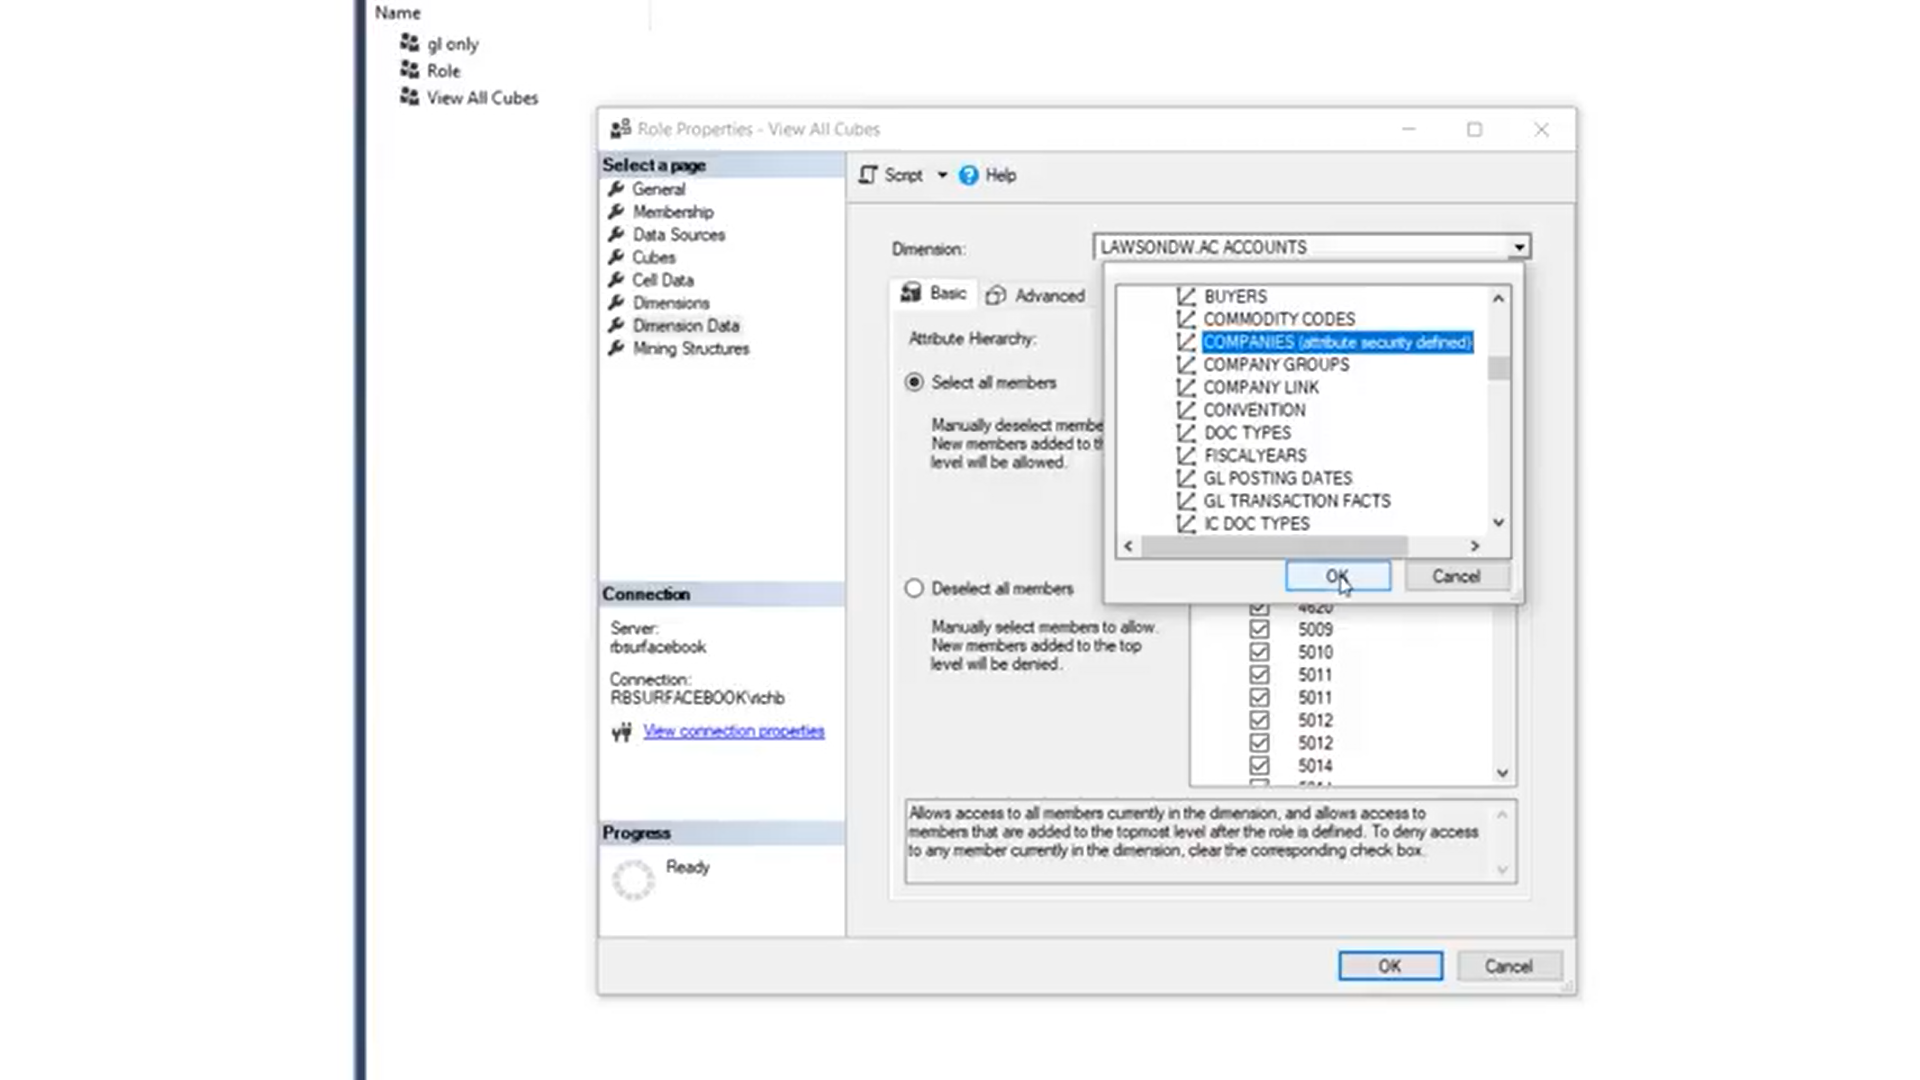
Then click the Dimension Data menu option. In the dimensions drop-down, scroll until you get to the dimension that you set the security on (In this example, it was the COMPANIES dimension). If the security has been set, it will have (attribute security defined) next to it.
How to Copy a Role
If you want to copy a role, right click on the role and select Duplicate. This will create a new copy of the role that you can rename and edit as needed.

